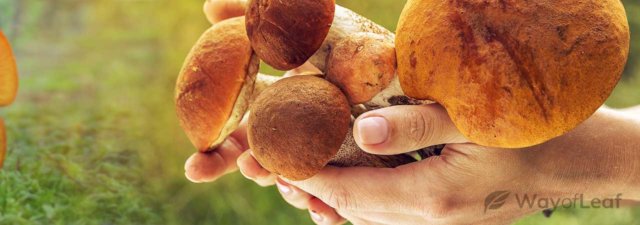
Growing mushrooms is a fascinating and rewarding hobby. Depending on the type of mushroom you wish to grow, it can also be fairly easy to get started.
Mushroom grow kits are widely available online and provide the most straightforward option for beginners. You only need to cut the bag open and spray the fully colonized mycelium block with water. Then wait a couple of days and watch your very first mushrooms start to form. In some cases, you’ll be harvesting your first flush in as little as a week or two.
However, it can be even more satisfying to grow mushrooms from scratch. Although there is more scope for something to go wrong, it is a gratifying process and a great way to learn about the mushroom life cycle.
This article explains how to grow mushrooms from start to finish for the absolute beginner. Here is all you need to know.
Mushroom Growth Cycle
Before we delve into how to grow mushrooms, it is necessary to explain the mushroom life cycle briefly.
Mushrooms are part of a much larger fungal organism. Their role is to produce spores, which are somewhat similar to a plant’s seeds. When mushroom spores land on a suitable surface and the conditions are favorable, they germinate, forming strand-like structures called hyphae.

Multiple hyphae join together to form what is known as mycelium. This white, fungal mass makes up the bulk of the organism and, when the time is right, it produces mushrooms. These mushrooms generate spores and release them into the air, thus beginning the cycle again.
Therefore, three basic elements are necessary for growing mushrooms:
- A source of spores. This could be a spore print, swab, or syringe.
- A substrate on which the spores can germinate and form mycelium, a process known as colonization.
- Favorable growing conditions.
There is also a variety of equipment involved. Some items are essential, while some are optional but will provide better results. The only other requirement is a little patience and willingness to learn.
So, here’s how to get started.
Growing Conditions
Mushrooms prefer to grow in humid conditions. Therefore, it is necessary to create an enclosed environment to keep them happy. This is usually known as a fruiting chamber.
Precisely what you use will depend on what mushrooms you are trying to grow. Small mushrooms will happily grow in plastic storage tubs, a method commonly known as monotub tek. Larger species tend to grow out of large plastic grow bags, sometimes known as unicorn bags. These bags must be kept in a controlled environment such as a mini-greenhouse or hydroponics grow tent.
It is also important to note that mycelium is prone to contamination as it grows. The humid conditions it favors are also ideal for mold and bacteria to thrive. Therefore, good hygiene and cleanliness are critical throughout the growing process. It is also best to grow mushrooms in a low-traffic area that won’t be disturbed too often.
Once the mycelium has colonized the substrate, fresh air and light are the factors that will trigger fruiting. A little ambient light is sufficient; it needn’t be particularly bright. However, if the inside of your fruiting chamber does not receive natural daylight, you might need a grow light instead.
Mushroom Cultivation Equipment
Below are some of the equipment and supplies that are necessary for growing mushrooms:

- Mushroom spores (print, swab, or syringe), or a pre-colonized grain bag
- Still air box (see below)
- Isopropyl alcohol 70%
- Paper towels
- Disposable gloves and face mask
- Microporous tape
- Agar plates*
- Scissors*
- A scalpel or craft knife*
- Lighter or another flame source*
- Grain (rye, wheat, millet, etc.)*
- Pressure cooker**
- One quart mason jars and lids (optional if using grow bags)
- Mushroom grow bags (optional if using jars and monotub tek)
- Incubation chamber (see below)
- Seedling heat mat with thermostat (optional, see below)
- Bulk substrate (wood pellets, coco coir, coffee grounds, etc.)
- Fruiting chamber (see below)
- Spray bottle for misting
*The starred items are unnecessary if using a pre-colonized grain bag.
**There are a few cheats if you don’t have access to a pressure cooker, although the results may not be as reliable.
Growing Process
The process of growing mushrooms can vary significantly depending on the species. Below is a general overview of the steps involved. However, we recommend conducting further research to learn the specifics of growing your chosen variety.
If you are growing mushrooms using a pre-colonized grain bag, you can skip straight to step 9.
1. Make a still air box
Professional mushroom growers use a laminar flow hood to create a clean work environment. It is a kind of air filter that prevents mold and bacteria from infecting the mycelium. Assuming that you don’t have access to this expensive equipment, a still air box is the next best thing.
The still air box is where you will carry out your inoculations and transfers. It provides a clean environment to reduce the risk of contamination while you work.
A still air box provides a clean environment to reduce the risk of contamination while you work.
There are a couple of ways to make one. Most people use a large, clear plastic storage box as their starting point. Some people make two hand-sized holes in the side of the box, allowing them to work inside.
However, it is also possible to just place the box upside down on a kitchen counter. Then pull it forward a few inches, so it hangs off the counter just enough to fit your hands underneath. It is easiest to do this while sitting on a chair.
Using the second method can make working inside the still air box more awkward. But it saves making holes in the side of the container, so experiment and see which you prefer.
2. Inoculate the agar
Put on the gloves and face mask. Then disinfect the inside of the still air box and work surface using isopropyl alcohol and clean paper towels. Disinfect the scissors and scalpel handle and place them inside the box. Peel the outer layer off the microporous tape to reveal a fresh surface and put that inside the box too.
Next, take the agar plates and carefully disinfect the outside surfaces. Agar is a nutrient-rich, jelly-like substance that is ideal for germinating spores. Place the disinfected plates inside the still air box but keep them closed.
Open the spore print, swab, or syringe. If using a syringe, you may wish to disinfect the surface of the barrel. The needle should already be sterile, but you can use a flame to sterilize it for a few seconds if you wish. Do this outside the box – isopropyl alcohol is very flammable!
Carefully take the lid off one of the agar plates. If using a spore print, use the scalpel blade to scrape a few spores onto the agar. Sterilize the blade with a flame first – do this outside the box. If using a spore swab, swipe it across the agar in an ‘S’ shape.
If using a spore syringe, squeeze a couple of drops out onto the agar. Technically, you could skip this step as syringes should be sterile. However, it is best practice to test the liquid for contaminants. It’s also fun to watch the mycelium growing out on the agar.
Keep the agar open for as little time as possible before closing it up again. If it is in traditional-style Petri dishes, you can use a strip of microporous tape to seal up the edges. If it is in an airtight container, this is usually not necessary.
3. Incubate the agar
Make a note of the date that you inoculated the agar for reference. You will then need to incubate it until healthy mycelium forms.
Move the plates from the still air box to your incubation chamber. This could be inside a storage box or an unused cupboard. However, it is essential to choose somewhere out of the way to minimize disturbances.
Depending on the species, it may be necessary to maintain a specific temperature within the chamber. If so, use a seedling heat mat with a thermostat to keep the mycelium within its optimal range. The precise temperature needed will depend upon the mushroom type.
Check the inoculated plates every few days to see whether mycelium is forming and watch for contamination. Healthy mycelium is white. If you see green, blue, brown, black, pink, or orange patches, you likely have contamination.
If a plate gets contaminated but also has healthy mycelium, you can transfer it to another agar plate.
4. Transfers
If you need to perform a transfer, set up the still air box and follow the disinfection procedures outlined in step 1.
Take the contaminated agar plate and a clean one. Disinfect the outsides and place them inside the box, keeping them closed. Sterilize the scalpel blade using a flame – do this outside the box.
Transfers are an effective way to rescue contaminated mycelium.
Next, open the contaminated plate and use the blade to cut out a small wedge of healthy mycelium. Take your sample as far away from the contamination as possible and close the lid immediately.
Then, open the new agar plate and drop your sample into the center of the gel. Close it up as quickly as possible and seal with microporous tape if necessary.
Repeat steps 3 and 4 until you have a fully colonized, uncontaminated agar plate.
5. Prepare the jars or bags
If you are using grow bags, there is very little you need to do here. They are designed with all the features you need for a straightforward grow. However, if you are using jars, you will need to do a little preparation.
As mycelium develops, it needs to exchange gases. Therefore, your jars need to be able to breathe. Most people facilitate this process by drilling a few 1mm holes in the lid and covering them with microporous tape.
Avoid making the holes too large, or mushroom pins might start forming before the grain is fully colonized.
6. Make your grain spawn
Mycelium is hungry, and once it has used up all the nutrients in the agar, it will need another growing medium. Cereal grains such as rye, wheat, and millet are ideal. You can also use popcorn or wild bird seed. Each of these options has its pros and cons. Check out our article on the best grain for mushroom spawn to learn more.
Once you have selected your grain of choice, you will need to wash, soak, and simmer it. How long this takes depends upon the grain. Next, it needs to be sterilized using a pressure cooker.
Place the prepared grain into your mason jars or grow bags and place them in the pressure cooker. Cover the jar lids with tin foil to ensure no water gets inside. Stand the containers on some spare lids or similar, so they do not touch the bottom of the pan.
Set the cooker to 15 PSI and sterilize for at least 90 minutes for jars or 3–4 hours for bags. Leave to cool for 24 hours.
If you do not have a pressure cooker, you can sterilize grain jars in a regular pan. Cover the lids with tin foil to ensure that no water gets in, and place them on top of some extra lids to prevent them from touching the base.
Fill the pan with cold water to around halfway up the jars and turn on the heat. Once the water boils, turn it down to a steady simmer for about two hours. You will need to keep checking back to ensure the pan does not boil dry. If the water level gets low, top it up with some more boiling water from the kettle. Leave to cool for 24 hours.
You can also purchase pre-sterilized grain bags from most mycology suppliers and skip this step altogether.
7. Inoculate the grains
Once the grains have cooled, you need to inoculate them. If you have cultured some healthy mycelium on agar, you will now add this to the sterile grain. You can also use a spore syringe to inoculate the grains directly, providing you are confident it is uncontaminated.
Disinfect and prepare your still air box and equipment as previously. You should also wipe down the jars or grow bags as a precaution.
Flame-sterilize your scalpel blade outside the box. Then, open one of the colonized agar plates and cut it in a criss-cross pattern to make small squares. Open the first grain jar or bag and tip in the agar. Close it back up as quickly as possible to reduce the risk of contamination.
Shaking the jar or bag speeds up colonization as the mycelium will have more inoculation points within the grain.
Give the jar or bag a shake to distribute the agar pieces evenly. This will speed up colonization as the mycelium will have more inoculation points within the grain. Repeat the process with your remaining plates and containers.
It is up to you how much agar you put into each container. If you only have one plate, you can split it between two or more containers. As a rule, the more agar you put into each jar or bag, the faster it will colonize. However, avoid using too much, which could cause the mycelium to overheat as it grows.
8. Incubate the grains
Now, wait for the grains to colonize. Incubate them in the same conditions as you did with the agar. The whole process can take several weeks, depending on the species, type of grain, and temperature.
Check the containers regularly for signs of contamination. If you spot anything untoward, it is best to discard the infected containers. Do not open them inside your growing space as you could risk spreading microscopic spores through the air.
Once the grains are around 30% colonized, shake the jars or bags to distribute the mycelium evenly. This will speed up the process significantly.
9. Inoculate the bulk substrate
Once the grain spawn is fully colonized, it is time to add it to the bulk substrate. This is the growing medium on which the mycelium will eventually produce mushrooms. The best substrate depends on the mushroom variety. Some prefer coco coir, while others favor straw or wood pellets.
Before inoculating the substrate, you will need to pasteurize it. This is somewhat similar to the sterilization process in step 6. However, it is a little quicker since the mycelium has already developed some resistance to contaminants by now.
Pasteurization involves heating the substrate at 150–180◦F for around two hours. Do this by placing it in a large pan of water on the stovetop. It is best to place the substrate inside a net bag or old pillowcase to make it easier to drain the water later.
Bring the water to a boil, then reduce the heat slightly. If possible, use a cooking thermometer to monitor the temperature range. The idea is to pasteurize the substrate rather than sterilize it. This allows beneficial bacteria to remain while destroying potentially harmful pathogens.
If using a monotub, disinfect it with isopropyl alcohol. It is also good practice to line the base with a piece of thin plastic, such as a garbage bag. This will help to prevent side pins which can be challenging to harvest.
Once the substrate is pasteurized and cooled, squeeze out the excess water and add it to your monotub or grow bags. Crumble in the inoculated grains and mix them through the substrate evenly. You may wish to add a thin casing layer on top, depending on the variety.
Finally, seal up the container. This will allow humidity to accumulate inside while the mycelium gets ready for fruiting.
10. Incubate the bulk substrate
This is the final incubation stage and should be much faster than the previous ones. Depending on the species, the mycelium could colonize the substrate in as little as 1–2 weeks. Once you see that the substrate has become white and fluffy, you’re ready to initiate fruiting.
11. Initiate fruiting conditions
Fruiting conditions can differ significantly from colonization conditions. You will need to research the species you are growing to learn their preferences.
However, all varieties have in common that they require fresh air and humidity to produce mushrooms. Therefore, it is necessary to open the container and mist it at regular intervals. Note that it is best to mist the inside of the container or fruiting chamber rather than the mycelium itself.
It is also best to introduce some ambient light at this stage. This will tell the mushrooms which direction to grow and stop them from becoming spindly.
After a few days, you should see your first pins starting to form. You can then marvel at how quickly they develop into mushrooms and finally harvest the fruits of your labor!
How Long Does It Take to Grow Mushrooms?
As you can see, the process of growing mushrooms from scratch is quite a lengthy one. Precisely how long it takes will vary depending on the type. In general, you can expect it to take at least two months or more.
The feeling of turning a few tiny spores into a generous mushroom harvest makes all the hard work worthwhile.
Of course, it is possible to speed up the process by using pre-colonized grain spawn or mushroom grow kits. These are great options for beginners as they remove much of the time and hassle associated with growing mushrooms.
However, anyone ready to take their mushroom cultivation skills to the next level will surely enjoy the journey. The feeling of turning a few tiny spores into a generous mushroom harvest makes all the hard work worthwhile.
How to Grow Mushrooms: Final Thoughts
We hope you found our beginner’s guide to growing mushrooms interesting and informative. However, please note that the above information is a basic overview and will differ slightly depending on your chosen mushroom species and technique.
We recommend conducting your own in-depth research into each stage to ensure that you get the biggest and best yield possible. And if you have any questions, comments, or growing tips, let us know below.
Here at WayofLeaf, we have everything you need to begin your mushroom-growing adventures. Check out the following articles to learn more:
- Magic Mushroom Spores: Beginner’s Guide
- What Is the Best Cubensis Strain?
- Mushroom Growing Problems and How to Solve Them