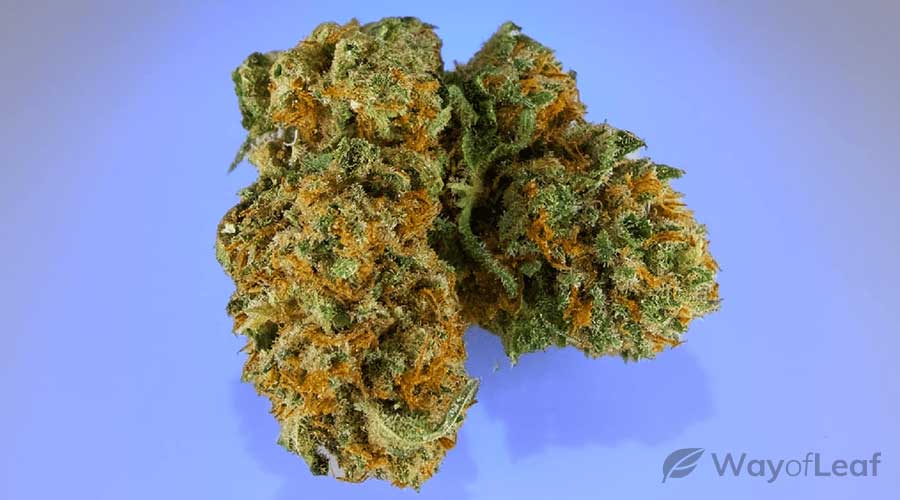
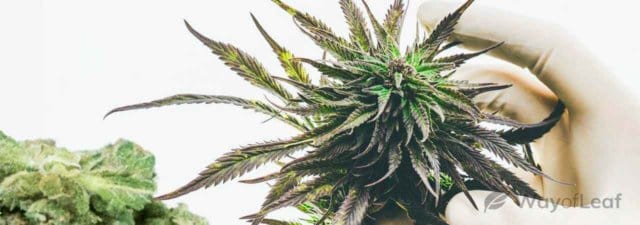
According to the entourage effect, cannabinoids work better together than in isolation. As a result, any strain that combines cannabinoids like CBD and THC may offer prominent benefits.
Harlequin is one such strain. It is a sativa-dominant (75%) hybrid containing 7-15% THC and 10-15% CBD. In other words, this strain offers you the best of both worlds. Users experience mildly stimulating, uplifting effects and the potential benefits of two potent cannabinoids.
The Harlequin strain is a cross of a Nepali indica, a Swiss landrace, Colombian Gold, and a Thai sativa. Harlequin consumers describe its effects as uplifting yet relaxing. The strain has a sweet smell and a herbal, spicy taste. It’s thought to have a mild high due to its relatively low THC level.
As Harlequin contains a generous CBD level, it is a popular medicinal strain. Many medical marijuana users consume Harlequin to address chronic pain and inflammation, stress, depression, and anxiety. Another reason for Harlequin’s popularity among medicinal consumers is that it offers a clear-headed high.
In this growing guide, we provide you with eight tips to help you grow Harlequin effectively.
1 – Should You Grow Harlequin Indoors or Outdoors?
Although you can grow Harlequin indoors or outside, you can enhance the CBD content by growing it inside in a controlled environment. If you grow it indoors, make sure you pay attention to your grow room’s relative humidity level.

Generally, CBD-rich plants must be harvested fairly early because cannabidiol degrades at a much faster rate than THC. Be prepared to harvest much earlier than with any THC-heavy strain.
Outdoors, this strain produces a yield of up to 21 ounces per plant. When growing indoors, the flowering time is approximately eight weeks. It can produce a bumper yield of up to 25 ounces per square meter indoors.
2 – Keep Humidity Levels in Check
Although Harlequin can handle higher humidity levels, it is best if you err on the lower side. This is especially true if the temperature in your grow room is high. This strain likes higher daytime temperatures. The ideal range is between 72-85 degrees Fahrenheit and between 15-20 degrees lower at night or when the lights are off indoors.
Although Harlequin can handle higher humidity levels, it is best if you err on the lower side.
Humidity levels should be at their highest when your plants are still seedlings. Keep the relative humidity (RH) levels at around 65-80% at this stage. Once your plants are in the vegetative stage, drop the RH to 55-65%. At this point, your Harlequin plants will have strong root systems and absorb more water from the soil.
Once you switch to a 12-12 light cycle to force your plants into flowering, cut the RH to 40-50%. By the late flowering stage, aim for 30-40%, with daytime temperatures at approximately 75 degrees. If you are growing Harlequin in a greenhouse, keep the humidity level below 50% as often as possible.
3 – Training Techniques
Harlequin is a big yielder, and you can get even more from the plant through proper training techniques. Above all else, training your plants will ensure good airflow in the canopy. Benefits include improved yields as all of the plant is exposed to light and airflow. If you don’t train or prune your Harlequin plants, they could develop bud rot.
Low-Stress Training (LST) involves bending or manipulating the branches to boost yield. LST itself means bending the plant as it grows and tying down any branches that become too long. By pulling the tops of the plants downward, you increase the production of the hormone auxin. SCROG is a variation of LST where you tuck branches down once they grow through a screen.
High-Stress Training (HST) methods are faster but also spell more danger for your plants. Topping involves removing the tops of the plants so that they become two new branches. As a bonus, the shock you send to the rest of the plant results in lower branch growth.
4 – Feeding the Harlequin Strain
A common mistake made by novice growers is to provide excess nutrients to seedlings. In reality, it is best if you begin with light feedings in the first week or two, especially if using soil as your growing medium. The nutrients from the soil should offer plenty of sustenance in the early stages.
If you are growing hydroponically, you have a greater level of control over nutrient intake. Rather than using store-bought chemical fertilizers, consider creating an organic compost tea to use with soil.

When your Harlequin plants are still seedlings, use clean, distilled water with a pH of 6.5-7.0 with no added nutrients for the first couple of weeks. The main nutrients required during the vegetative stage are nitrogen, phosphorus, and potassium (NPK).
Here is what each nutrient can do for your plant:
- Nitrogen: Boosts photosynthesis and is extremely important during the vegetative stage. Reduce nitrogen intake during flowering.
- Phosphorus: Helps your plant grow strong roots; you should add more during flowering.
- Potassium: Strengthens your plant’s metabolism, aids photosynthesis, and increases the production of vital proteins.
During flowering, use a CalMag supplement – calcium and magnesium – as these nutrients improve your plants’ growth. Make sure you stop adding fertilizers 2-3 weeks before harvesting.
5 – What About Lighting?
This is an issue faced by indoor growers. Your plants don’t need as much light as you think during the seedling stage. Fluorescent light tubes are often enough to help your young plants grow. Powerful sources such as HID lights could damage your crop if positioned too close to the seedlings. Begin with your seedlings 80 cm away from the HIDs. Reduce the distance each day, depending on the overall wattage.
An increasing number of growers favor LED lighting because it provides plants with a fuller spectrum of light.
As for the light schedule, 18 hours of light usually is enough, although some growers expose their seedlings to constant light. In the vegetative stage, make sure your Harlequin plants get at least 18 hours of light each day. To force your plants into flowering, change the light schedule to 12/12 hours (12 hours light/12 hours darkness).
When your plants are flowering, HID lights (which fall in the yellow or red color band) provide excellent results. An increasing number of growers favor LED lighting because it provides plants with a fuller spectrum of light. Another bonus of using LEDs is they are more efficient than other types of light.
6 – A Note on Watering Your Harlequin Plants
Many growers make the mistake of not thinking clearly about the water they use for their plants. After all, if we can drink it, it must be okay for plants, right? In reality, it depends on where you live. In specific locations, the water contains an excessively high level of dissolved minerals that can build up in a plant’s root zone.
As a result, nutrient intake is affected. Alternatively, the water could contain pathogens that don’t impact humans but are devastating to plants because they cause root disease. In areas where water has high levels of chlorine, soil microbes could be affected. We recommend investing in a reverse osmosis (RO) system if the water in your area is not pure.
Another common issue is overwatering. When conditions are too wet, your plants could develop fungal root diseases. As a rule of thumb, dig your knuckle into the soil or growing medium. If it feels dry a couple of inches down, you can water the plant. Otherwise, wait until the soil is dry enough.
7 – What Happens During the Flowering Stage?
This is an exciting time because it is a matter of weeks before your plants are ready for harvesting. With Harlequin, the flowering time is around eight weeks. This is relatively short; there are sativa strains that take up to 16 weeks to flower! During the first week of flowering, you may notice a slight slowdown in growth. This will be followed by the appearance of small flowers at the nodes of the plants.

By the third week of flowering, your Harlequin plants will be almost finished growing. The plants should have grown by between 25% and 50% in the last three weeks. Vegetative growth is practically finished by week four, and from this point onward, your plants will focus on producing buds.
After the midpoint, the flowers of the plant will experience an acceleration in growth. The buds start swelling with around three weeks left, and there will be a noticeable odor emanating from the plants. Most of the plants’ calyxes will look ready to burst and produce resin in the final two weeks. In the final week, the pistils start to change color, and a thick coat of trichomes will cover the plant.
8 – When Do I Harvest?
As mentioned, Harlequin’s flowering time is eight weeks. However, this doesn’t necessarily mean you should wait for 56 days to elapse before harvesting. Check your plants regularly to see if the white pistils are beginning to change color.
When harvest time approaches, the pistils switch to a red or deep orange color. Although you can harvest any time after 50% of the pistils change color, it is best to wait until 70-80% do. Leave it any later, and the buds you pick will offer a sedative-type high.
Although you can harvest any time after 50% of the pistils change color, it is best to wait until 70-80% do.
Harlequin, in particular, is known for being covered in a thick layer of trichomes when it is ready to harvest. Using the trichome method, wait until they are milky-white before plucking the buds. In some cases, the trichomes may have a mushroom-head at the optimal point of harvest. You will need to purchase a magnifying glass to identify the trichomes.
We hope that you found these tips for growing the Harlequin strain helpful. Please let us know in the comments how you got on growing this strain.


![8 Tips for Growing God’s Gift Marijuana [Grower’s Guide]](https://wayofleaf.com/wp-content/uploads/2019/01/wol_growing-gods-gift-marijuana-640x225.jpg)

![Cannabis Growing During Different Seasons [Guide]](https://wayofleaf.com/wp-content/uploads/2018/12/cannabis-and-the-four-seasons-640x225.jpg)
![How to Use CO2 to Increase Your Cannabis Yields [Guide]](https://wayofleaf.com/wp-content/uploads/2018/11/mj_how-to-use-co2-to-increase-marijuana-yields-explained-1-640x225.jpg)


![5 Ways to Prevent Plant Stress [And Save Your Weed Crop…]](https://wayofleaf.com/wp-content/uploads/2018/08/wol_ways-to-prevent-plant-stress-640x225.jpg)

