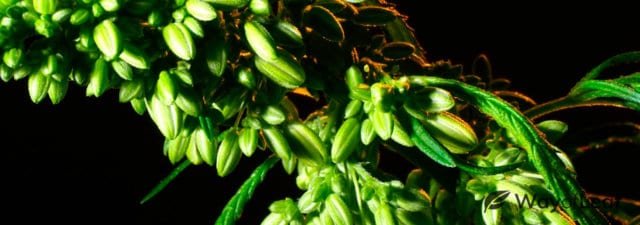
Durban Poison is one of the most sought-after pure sativa strains on the market, and with a THC content of 16–20%, it provides you with a powerful yet clean and happy high.
American weed advocates discovered it in the 1970s and brought it over from the South African port town of Durban. It has been crossed with a variety of strains over the years, so you should find its genetic code in numerous popular hybrids.
A man named Ed Rosenthal supposedly ‘discovered’ Durban Poison and brought it across to the United States. After developing the strain via selective inbreeding, he passed on a few seeds to his friend, Mel Frank. The goal of the duo was to reduce flowering time while increasing yield.
After working with multiple generations of the plants, Mel determined that there were two distinctive phenotypes. If you live in America, you are probably using the ‘A’ strain; the ‘B’ strain ended up in Europe.
Durban Poison is a fantastic morning ‘pick-me-up’ (like a cup of coffee) and provides you with an invigorating cerebral high. It is also the strain of choice for mood-altering conditions such as anxiety and depression.
If Durban Poison is your favorite strain, you’ll be delighted to know that it isn’t one of the most difficult to grow. This growing guide provides eight key steps and tips to improve quality and yield.
Tip #1 – Germinate the Seeds in Sterile Soil or a Hydroponic Growing Medium
As we mentioned, the growing difficulty of Durban Poison is ‘easy’ or ‘moderate.’ The first step is to germinate the seeds. We advise you to steer clear of Jiffy Cubes #7 for Durban Poison because they tend to stunt growth.
If you would prefer to use a hydroponic medium instead of sterile soil, it is best to plant in vermiculite once the seed has germinated. This substance provides your seedling with a lot of oxygen and is easy to grow the roots in.
For beginner growers, the growing difficulty of Durban Poison is classified as ‘easy’ or ‘moderate.’
The paper towel germination method is a good option, but make sure you regularly check the towels because they dry out quickly. When the root comes out of the seed by at least 1/16 of an inch, use tweezers to transplant the seed to your growing medium. Use 5-55-17 marijuana plant food on the seedling to stimulate growth. During the first couple of weeks, keep the temperature in the 72-80-degree Fahrenheit range.
Tip #2 – Grow Outdoors for the Highest Yield

You can grow Durban Poison indoors or outdoors because it is resilient to all weather types. If you grow indoors, use a hydroponic system for the best results. It will take around nine weeks to grow indoors. The system will provide you with an estimated 13 ounces per square meter.
However, the Durban Poison plant prefers being outdoors, where it can grow towards the sky. It is not unusual to see one of the plants towering above you at a height of over seven feet! If you elect to grow outdoors, the plant should be ready for harvest by early October at the latest. Expect a yield of around 16 ounces per plant.
Tip #3 – Add Human Urine During the Vegetative Stage (No, Really!)
Believe it or not, human urine contains a variety of valuable nutrients (assuming you have a healthy diet). These nutrients can help your Durban Poison plant flourish during its vegetative stage.
You already understand the importance of adding a high amount of Nitrogen (N) during this growth stage. It is also essential to add Potassium (K) and Phosphorus (P). However, some growers like to add urine to a solution that also includes plant food, Epsom salts, and a couple of other ingredients.
Research in Sweden suggests that diluted human urine is a fantastic fertilizer for farm use. It improves the recirculation of N-P-K and reduces the environmental impact of wastewater. Hopefully, you already know that you can’t urinate directly onto the plant or the soil!
Instead, create a mixture that is one part urine and ten parts water. You can increase the ratio to 1:20 or 1:30 for younger plants when using soil as your growing medium. Wait until the little round leaves (cotyledons) have fallen off your seedlings before using any fertilizer regime. Depending on your diet, urine can have a high level of salt. As a result, make sure you allow runoff, which you throw away.
Research in Sweden suggests that diluted human urine is a fantastic fertilizer for farm use. It improves the recirculation of N-P-K…
Change the Ratio in a Hydroponic System
If you use a hydroponic growth medium, a ratio of 1:60 is a good start. Make sure you adjust the rate depending on your plant’s needs. Urine contains nitrogen, which bacteria consume as food. The bacterial protoplasm stores the nitrogen. When the bacteria die, the nitrogen is released and used by the plants.
Other nutrients included in human urine include manganese, calcium, potassium, phosphorus, vitamins B6 and B12, zinc, iron, and creatinine. Urine also contains auxin, which is known to boost flower growth. One of the main issues with urine is the high salt content.
Urine may also contact pathogens once it has left the body. Don’t use urine if you have a kidney or urinary tract infection. It probably isn’t a good idea for indoor growing either, due to the smell!
Tip #4 – Protect Your Plants Outdoors
If you live in an area that gets plenty of sunlight, or somewhere where marijuana cultivation is legal, consider growing outdoors. You benefit from lower electricity bills and a higher yield.
However, marijuana grown outdoors is vulnerable, and Durban Poison is no different. It is susceptible to fungi and bugs. Also, animals such as deer and rodents can come along and rip your garden to pieces.
Put up a secure fence to keep the bigger pests at bay, and visit your garden every few days. Also, do not go more than a week without visiting your plot. Soil is best for outdoor growing. Try to find a spot that provides sun from at least mid-morning to mid-afternoon.
Ideally, you will have a greenhouse, which negates the need for a fence. Disguise it as a tool shed if necessary. Growing weed in a garden is far better than in a pot. If you go down this route, dig a large hole. Don’t expect the weed plant to penetrate clay and rubble unless you’re confident that the topsoil is of premium quality.
If you don’t have a greenhouse, put a roof over the weed plants and train them to stay beneath it. Remember, Durban Poison plants grow tall! This is an essential point if trying to develop a “secret” operation (which, by the way, we do not recommend). It is also crucial to have an excellent source of water nearby. Dragging heavy buckets of water to a site is hard work and looks pretty suspicious.
You can deal with pests such as mites and bugs by creating organic pesticides. Garlic is one of the finest ingredients you can use in any spray. Most insects HATE it.
WayofLeaf Tip: Try using garlic mixed with water as a natural insecticide for your Durban Poison grow.
Tip #5 – Adding the Right Nutrients at the Right Time
As we mentioned above, Nitrogen (N), Phosphorus (P), and Potassium (K) are the three most essential ingredients. As Durban Poison is pure sativa, you can be a little lighter with the feeding. We recommend being more vigilant for signs of nitrogen burn than you would with other plants. The next most important nutrients are sulfur, magnesium, and calcium.
Focus on adding high levels of P during rooting and germination. Allow nitrogen to take center stage during the vegetative stage. If you purchase plant food, make sure it has trace amounts of boron, copper, zinc, manganese, iron, and molybdenum. If you recall, we mentioned Epsom Salts during the ‘adding human urine’ tip. They add sulfur and magnesium to the mix.
If you use a hydroponic growing medium, add a tablespoon of hydrated lime or dolomite per gallon of growing medium. It adds plenty of nitrogen, magnesium, and calcium.
Your growing medium needs excellent drainage. Typically, you would water once a week with normal drainage. If you have excellent drainage, you can water your Durban Poison plants every 3-5 days. You can improve matters by adding lava rock or Perlite to the medium. As a result, your plants will grow faster because of the enhanced oxygen to the roots. Silica could also strengthen the plant during the growth cycle.
WayofLeaf Tip: Improve drainage and enhance oxygen to the roots of your Durban Poison plants by adding lava rock or Perlite to your growing medium.
Finally, please take care not to over-fertilize your Durban Poison plants, as they are more susceptible than most. Always carefully read the instructions that come with the fertilizer. To begin with, use 50% of the recommended dose and monitor your plants. If they cope with the nutrients, add a little more and continue the process throughout. Overfertilization can kill your plants!
Tip #6 – Keep Your CO2 Levels in Check
Carbon dioxide is like manna from heaven for your marijuana plants. Durban Poison, in particular, responds exceptionally well to elevated CO2 levels, to the point where you can double the yield.
As you probably know, plants use CO2 for photosynthesis. During this process, plants create sugars they require for the development of weed plant tissues. Bump up the CO2 levels, and you increase sugar production and growth rate.
Burning natural gas can produce CO2. Venting heat and carbon monoxide to the outside air is crucial. CO2 is best used during the 8–10-week flowering stage because this is when the plant is at its most dense, which means it has trouble circulating air around its leaves.
It is possible to purchase costly CO2 systems. Alternatively, you could try the quick and easy sodium bicarbonate and vinegar solution idea. Mix around 300 mL of vinegar with a tablespoon of sodium bicarbonate. It will become frothy and release CO2.
Make sure you create the solution just before you close all entrances to your growing room. Another idea is to drip vinegar onto the sodium bicarbonate so that it provides a slow release of CO2.
WayofLeaf Tip: Carbon dioxide enhancement can boost your Durban Poison yields by up to 30%!
Overall, carbon dioxide enrichment should boost your yield by at least 30%. However, it is far from being a risk-free venture. As long as the air is over 200 ppm of carbon dioxide, it should be enough to ensure your plants have ample nutrients for photosynthesis. As it happens, there is enough CO2 in the air already!
Remember, elevated CO2 levels are potentially deadly for humans, so don’t fill your home with it!
Tip #7 – Temperature Considerations
Durban Poison is a tough plant with lifespans in both the southern and northern hemispheres. It can grow in a wide temperature range between 65- and 85-degrees Fahrenheit.
However, many growers claim that Durban Poison can safely grow at temperatures up to 90 degrees. It rises to 95 degrees if the plant is growing in a CO2-enriched environment (1500 ppm). Such an area needs regular venting to keep humidity levels down.
Although the maximum temperature is rather high, it doesn’t mean you’re growing it at the optimal temperature in the 90-degree range. It is best to grow at 85 degrees during the vegetative stage (in a well-vented area). Drop the temperature below 80 degrees during the flowering stage. Above all, please make sure the temperature remains over 70 degrees during the day and does not fall below 60 degrees at night.
Mild shock may occur if you expose your Durban Poison plants to temperatures below 60 degrees at any time. Repeated exposure to temperatures below 50 degrees could kill the plants. Elevate your growing pots if you are concerned that the ground is sucking the heat from the roots.
Exposure to temperatures below 50°F is almost certain to cause devastation to your Durban Poison crop…
Remember, when the temperature rises, the air has a better ability to hold water. The result is reduced humidity, along with the risk of fungi. Speaking of humidity, make sure it remains no higher than 60-65% during the vegetative stage. Reduce it to as low as 30% during flowering. High humidity is bad for your plants, except in the germinating and rooting stages.
Tip #8 – Harvesting for Maximal Yield
There are few better moments in a marijuana cultivator’s life than the first time he or she cuts down the first ‘ripe’ plant. Your Durban Poison plant is ready for harvest when at least 70% of the white pistils turn brown or orange.
The time of harvest dictates the THC content of your plants. If you harvest too early, you don’t get the full potency. However, if you wait until almost all the pistils have changed color, the THC will transform into CBN. This ruins the psychoactive effects that you would otherwise expect to receive from Durban Poison.
If you are unsure as to when to harvest, take a sample when almost half of the pistils have changed color. If you think it isn’t strong enough, wait another week and try again. Until you become experienced, it is mostly a case of trial and error.
WayofLeaf Tip: If you wait until all of the pistils on your Durban Poison plants have changed color, the THC will break down into CBN and minimize the psychoactive effects of the buds.
When sampling, take buds from the top or center of the plant, as they are most likely to be ripe first. Once the lower buds reach maturity, you will notice that they get larger and fuzzier.
Cure & Dry Your Buds
The best method of curing and drying your Durban Poison is to bring it indoors. Hang it upside-down in a room at the right humidity and temperature. Wait a few days and check moisture levels. When it is sufficiently dry, store the marijuana in an airtight mason jar with a little space. Open the containers every couple of days for a few minutes. In most cases, your Durban Poison is ready after a few weeks’ worth of curing.
Your patience is rewarded at this stage because air-dried weed tastes far better than its quick-dried counterpart. It is a bad idea to try and dry your Durban Poison in the sunshine because you only reduce potency. You can even dry marijuana in a paper bag at a pinch! We also recommend avoiding microwave drying because it severely impacts the taste. The last thing you want is for anything to spoil the enjoyment of this wonderful strain.

![How to Spot Bad Cannabis Seeds [Comprehensive Guide]](https://wayofleaf.com/wp-content/uploads/2020/09/wol_how-to-spot-bad-cannabis-seeds-640x225.jpg)
![How to Use Neem Oil for Cannabis Plants [Organic Pest Control]](https://wayofleaf.com/wp-content/uploads/2020/07/wol-banner-neem-oil-for-cannabis-plants-640x225.jpg)

![The Best Insects to Benefit Your Cannabis Garden [Top 10]](https://wayofleaf.com/wp-content/uploads/2020/04/mj_the_best_insects_to_benefit_your_cannabis_garden-640x225.jpg)

![What Is NPK? [Fully Explained]](https://wayofleaf.com/wp-content/uploads/2019/07/mj_what-is-npk_1920-640x225.jpg)


![Why Does Cannabis Turn Purple [Myths and Facts]](https://wayofleaf.com/wp-content/uploads/2018/11/wol-banner-why-does-cannabis-turn-purple-640x225.jpg)
![How to Make a Marijuana Grow Tent for Just $2… [Say WHAT!?]](https://wayofleaf.com/wp-content/uploads/2018/10/wol_how-to-make-a-marijuana-grow-tent-for-just-2-say-what-640x225.jpg)

