Topicals are one of the best ways to enjoy the medicinal properties of cannabinoids, especially for local problems like pain. Ointments, creams, and balms offer targeted relief where needed most and avoid metabolism by the liver, which can reduce bioavailability. Topicals also reduce the risk of side effects since they are applied directly to the skin.
The main drawback is cost, with many products coming close to $100 for a small jar. One solution is to create DIY cannabis and CBD topicals at home. The materials can still be on the expensive side initially, but you can make generous quantities that are ideal for frequent use. The other advantage of homemade topicals is that you completely control the ingredients. You can make them as simple or elaborate as you like!
This step-by-step guide explains how to create your own cannabis and CBD topicals at home.
What You Will Need
- 1 cup high-quality cannabis or hemp flower
- 1 cup oil (coconut, olive, grapeseed, etc.)
- Slow cooker or double boiler
- Mesh strainer
- Cheesecloth or coffee filter
- 1oz natural beeswax (pellets or shavings from a block)
- Essential oil(s) of your choice (see below for our recommendations)
- Clean brown or blue glass jars with lids
- Blank labels and pens
Directions
Place the oil in the slow cooker or top section of the double boiler.
*We used coconut oil as it is high in saturated fat, making it perfect for binding with lipophilic cannabinoids. It also has a high smoke point in comparison to many other oils, reducing the risk of burning. As it is solid at room temperature, we warmed the oil to melt it before adding the cannabis.
Break up the cannabis buds into small, evenly sized pieces and add them to the oil. Stir well to distribute the pieces evenly.
*It is not necessary to decarboxylate the cannabis since the aim of topicals is not to get high. The acidic cannabinoids present in raw cannabis (THCA, CBDA, etc.) have anti-inflammatory properties, making them ideal for topical use. Furthermore, some cannabinoids will naturally decarboxylate during the infusion process, providing a blend of cannabinoids.

Set the heat to the lowest temperature and warm the oil for 2–6 hours. Stir the oil at regular intervals, and do not allow it to boil.
The longer the infusion time, the more potent the oil will be.

Allow the oil to cool slightly. Then line the mesh strainer with the cheesecloth or coffee filter and strain the oil into a clean bowl.
You can discard the cannabis pulp or save it for cooking infused dishes later.

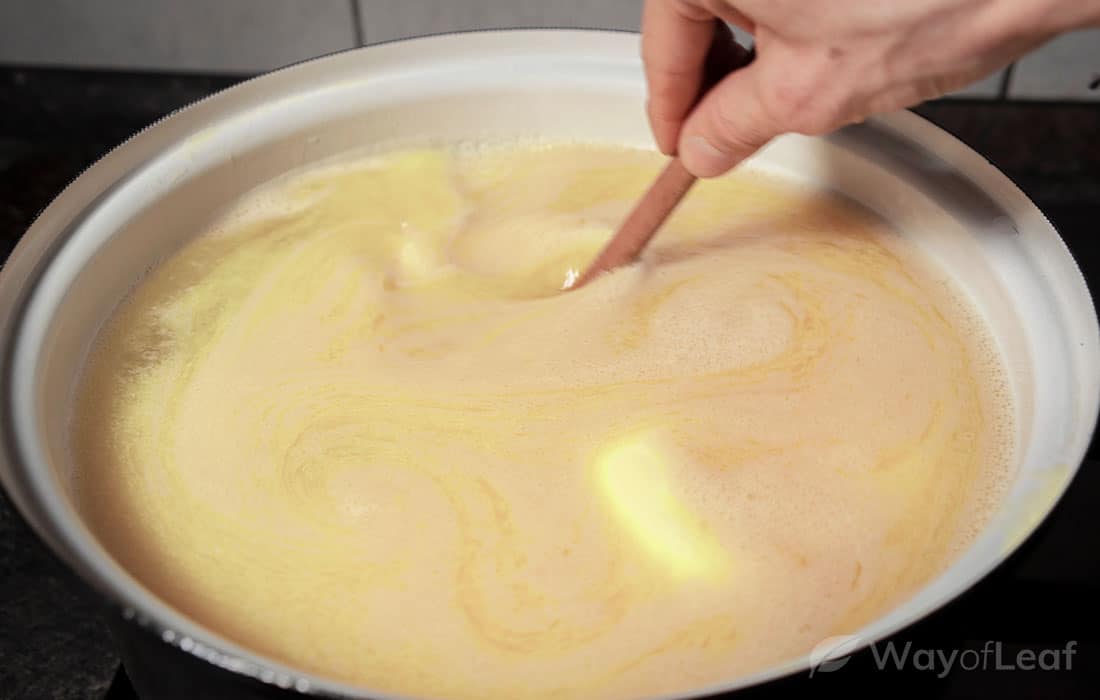
Return the oil to the slow cooker or double boiler and add the beeswax. Stir well and heat gently until the beeswax has melted into the oil.

Turn off the heat and add 3–5 drops each of your preferred essential oil(s). Mix thoroughly.
Here are some of our favorite combinations:
Frankincense and myrrh – these two resin oils are known for their anti-inflammatory and analgesic effects and appear to work even better in combination. This blend may help with painful, stiff, or swollen joints or muscle pain.
Lavender and peppermint – this combination is cooling and calming, making it potentially suitable for headaches, itchy skin, and more.
Lavender and tea tree – these essential oils have potent antimicrobial activity and soothing effects, which could prove helpful for acne-prone skin.
*Always dilute your essential oils in a suitable carrier oil and test on a small area of skin when using them for the first time. Discontinue use immediately if any irritation occurs.

Carefully pour the finished product into clean jars and put the lids on loosely until it has cooled and set. Then tighten the lids and label the jars with the ingredients and date.

Your DIY cannabis topicals should keep for several months when stored in a cool, dry place. Avoid exposure to heat and sunlight as these will speed up degradation.

A Simplified Method for DIY CBD Topicals
If you are making CBD topicals, you can simplify the process by using a high-quality CBD oil and skipping steps 1–4. We recommend using 30mL of CBD oil to one cup of base oil. You can reduce the amount of base oil or increase the quantity of beeswax very slightly so that the texture is not too loose.

![Why Is CBD so Expensive? [The TRUTH Revealed…]](https://wayofleaf.co/wp-content/uploads/2018/07/mj_why-is-cbd-so-expensive_1920-640x225.jpg)


